
 1pcs 3.0mm Pitch SMT DIP ...
 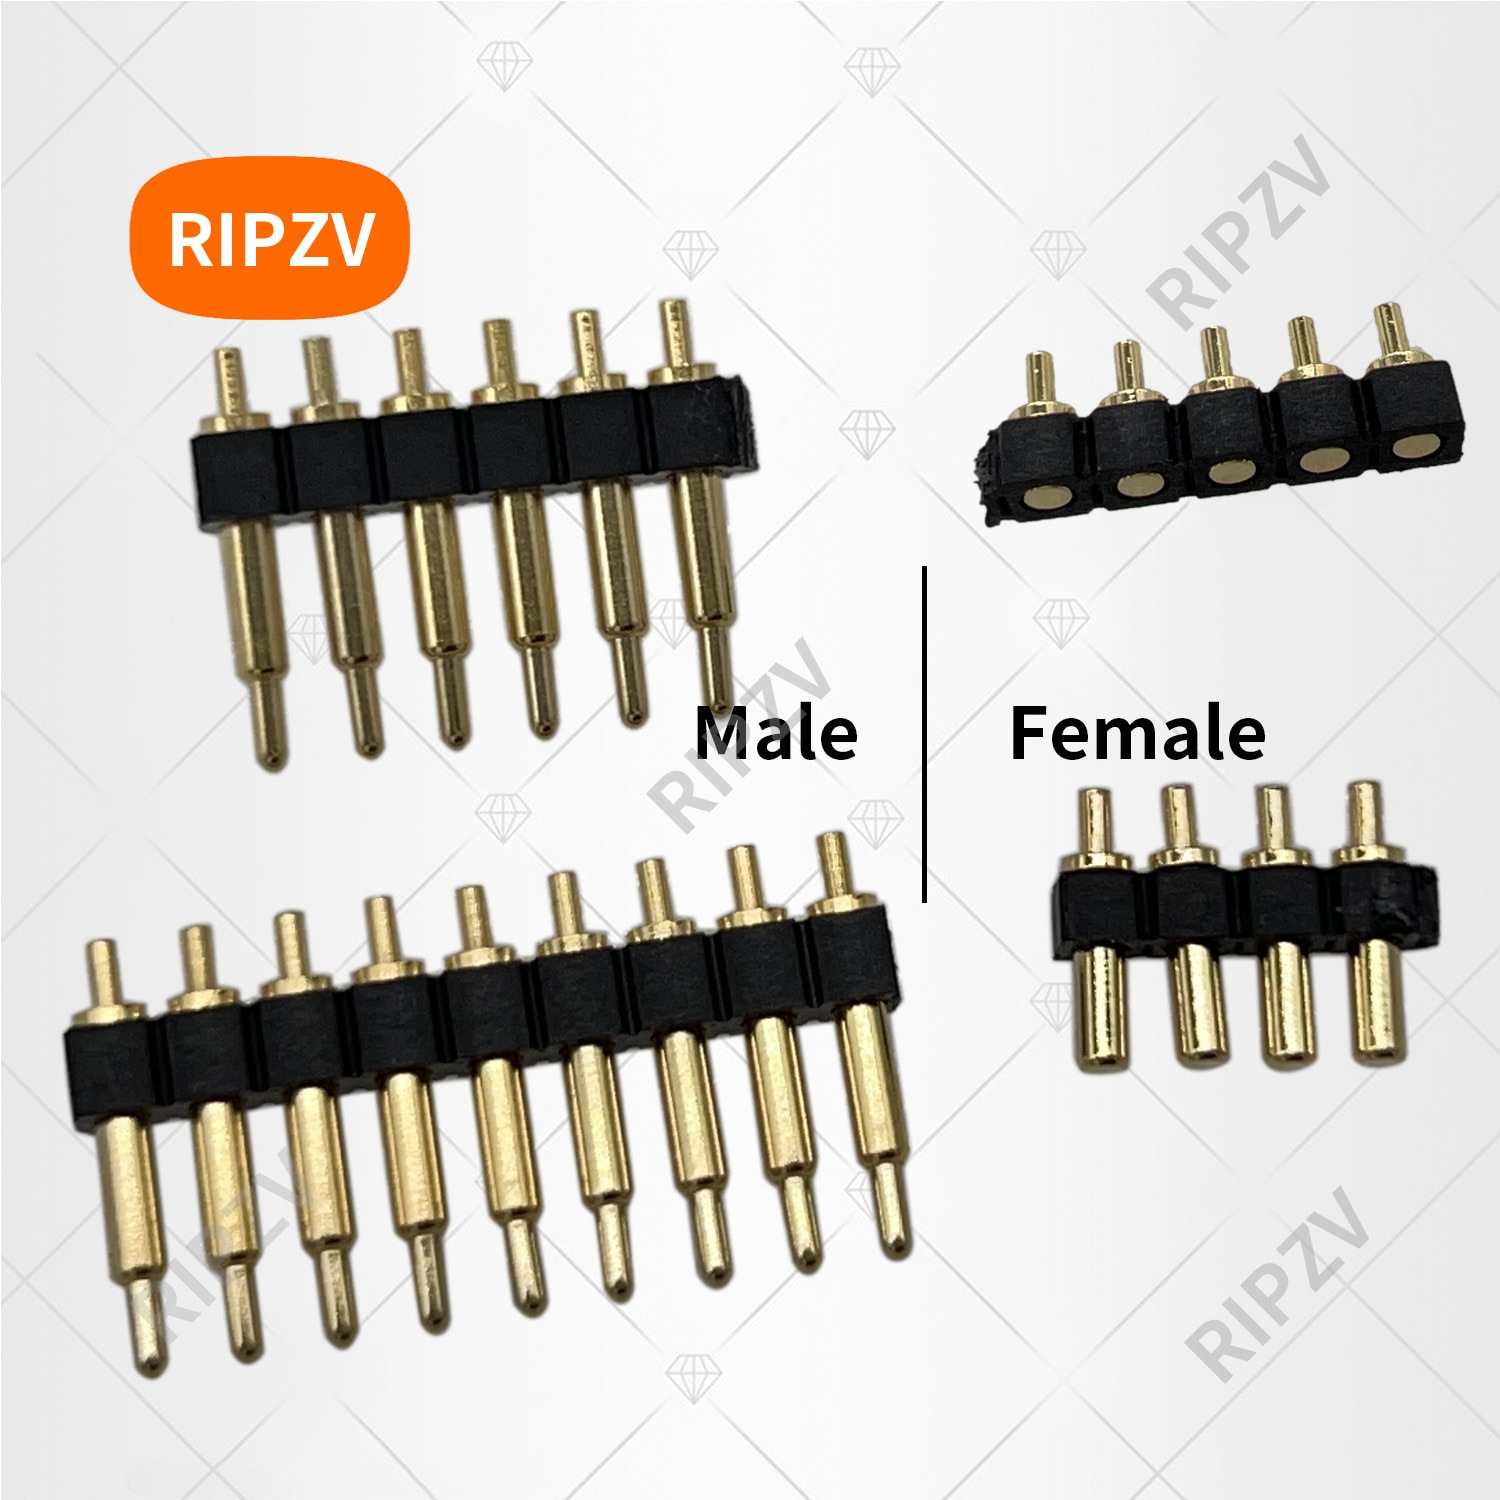 1pcs Male / Female Spring...
 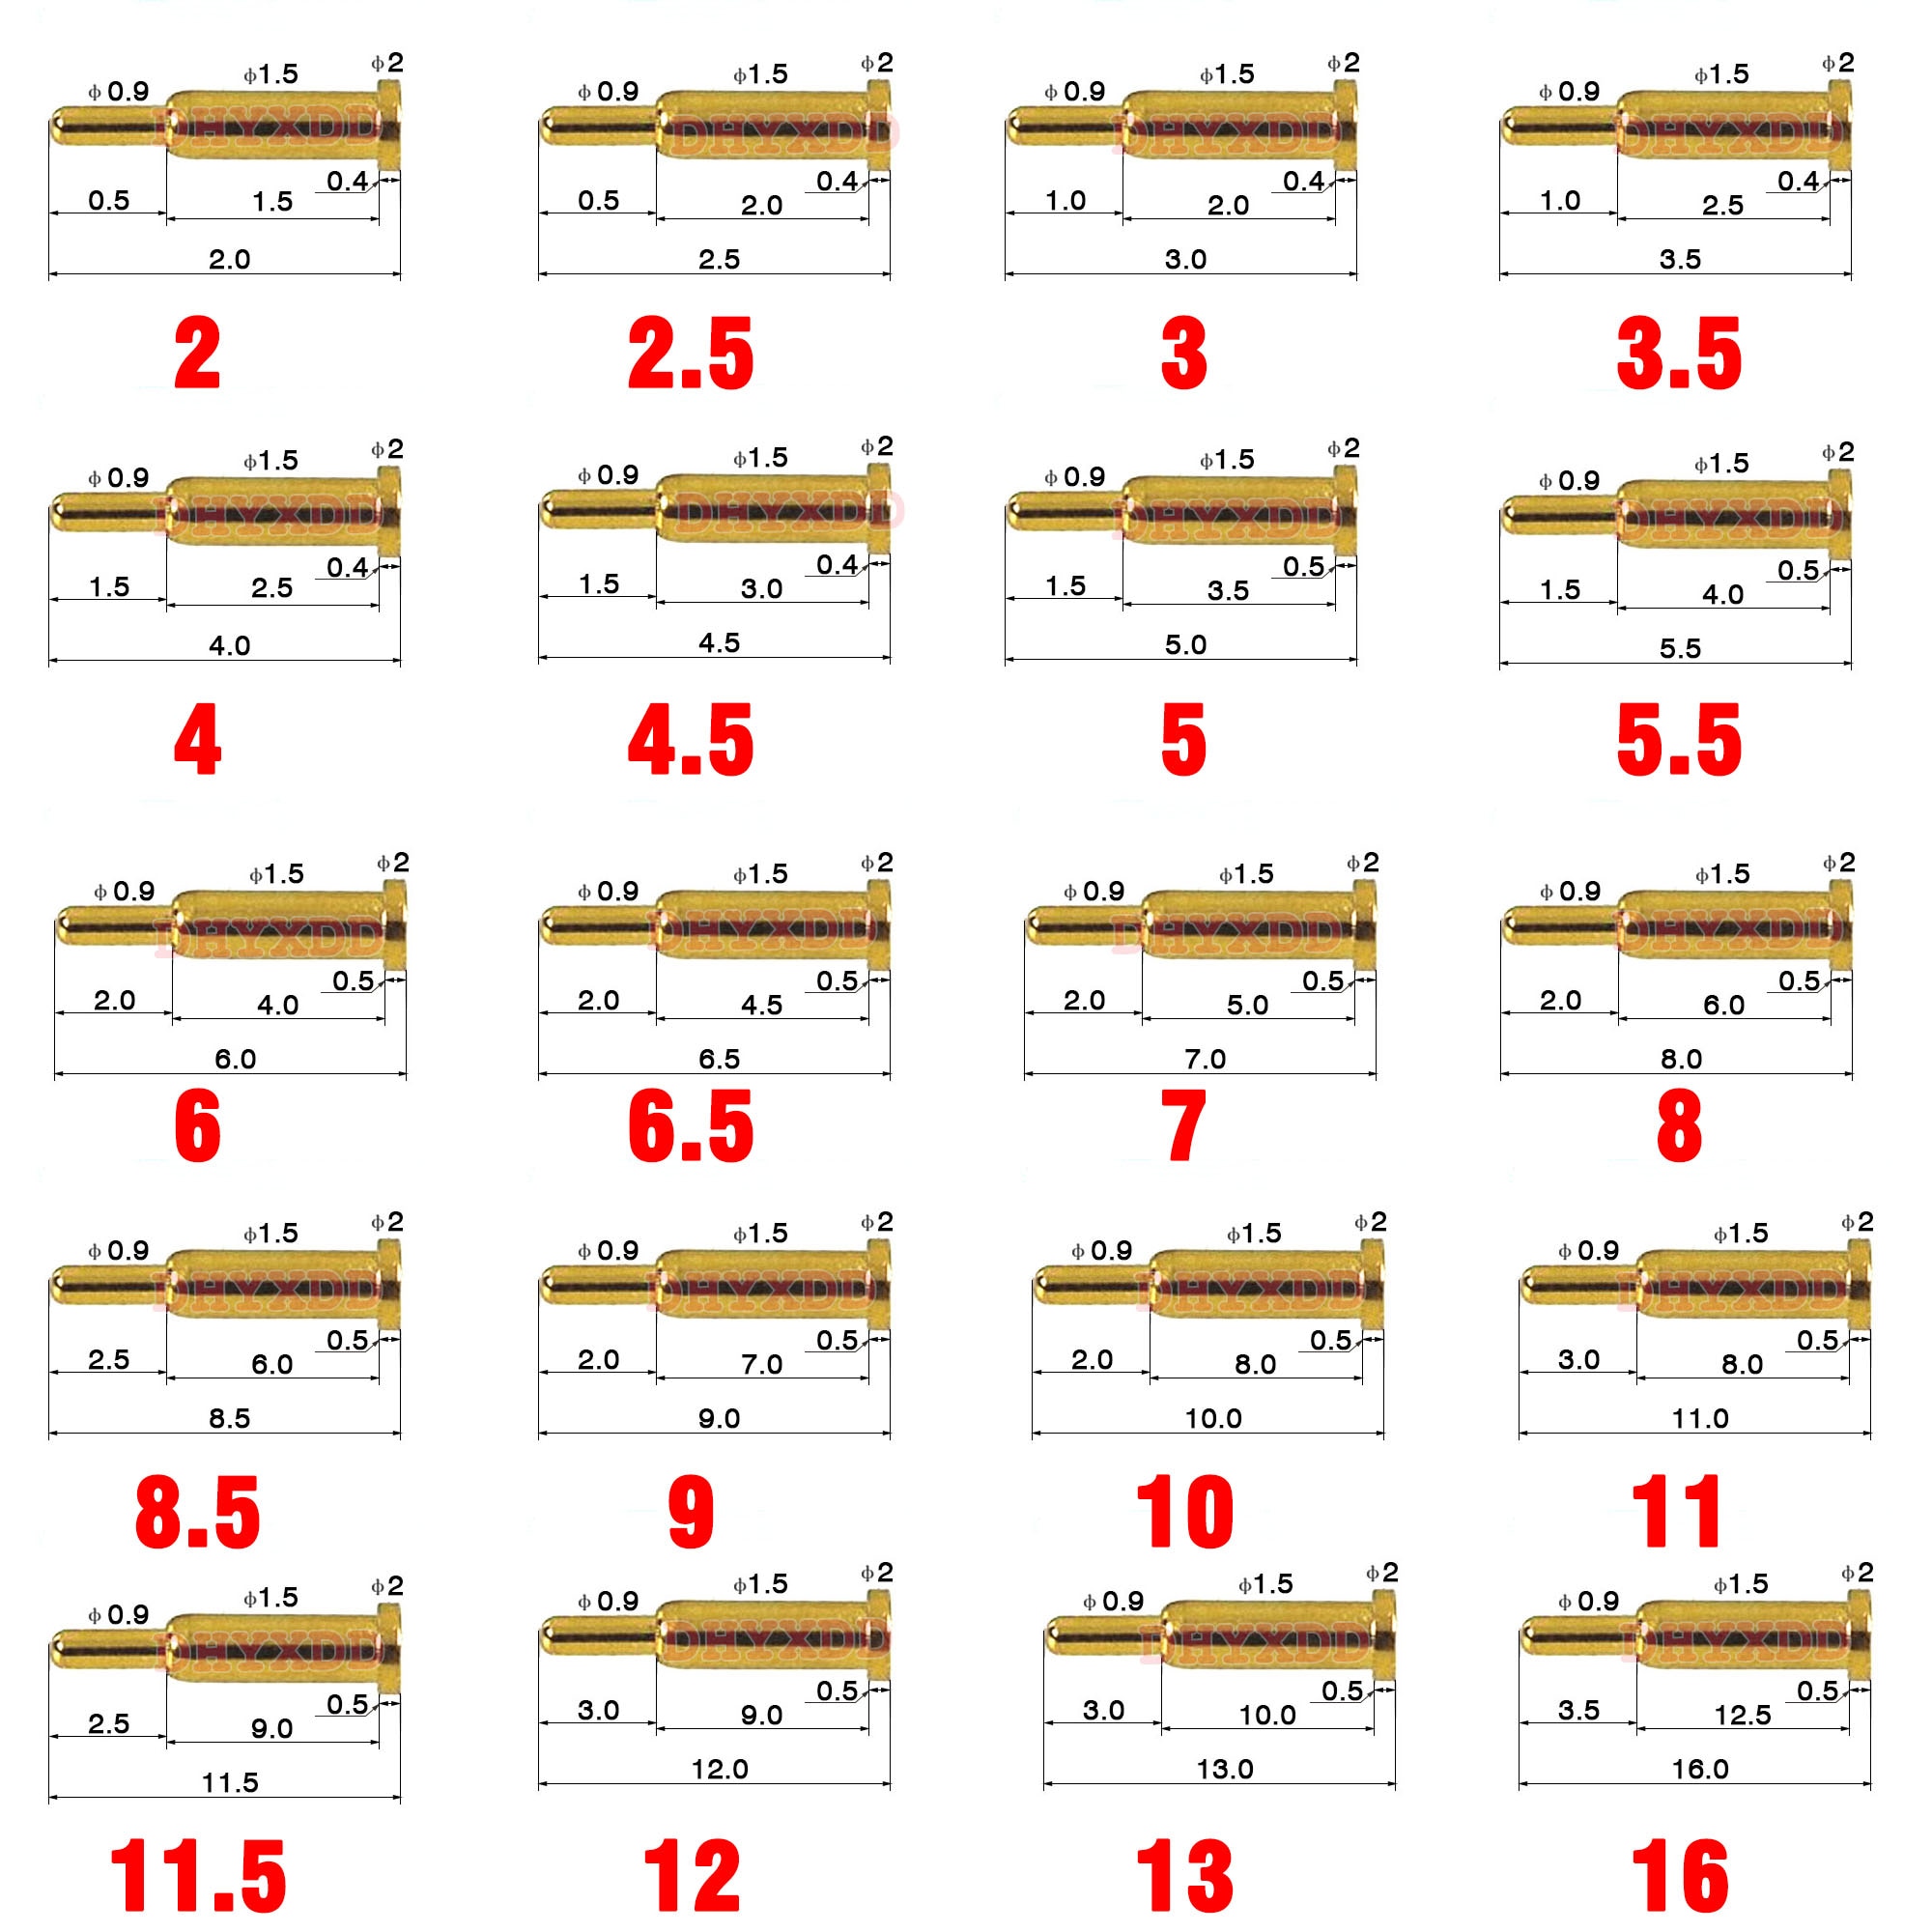 5Pcs Pogo Pin Connector P...
 Tax Manager / Taxes Guide
The
taxing system is one of the important aspects of your store. When setting your sales tax rates you will
need to make sure that it remains easy to understand for both you, and your customers.
Taxes in the United States will generally require you to collect tax where you have an established Nexus, also called “sufficient physical presence”. Nexus is a legal term that refers to the requirement for companies doing business in a state to collect and pay tax on sales in that state.
As an example, if you sell goods or services in Los Angeles, you must file and pay Los Angeles county tax, as well as California state tax.
It may also be required that, the freight, handling and/or delivery charges are considered taxable in certain jurisdictions. Every state considers freight costs differently—some only tax a portion of the shipping cost, others tax the whole amount, and some don’t tax shipping at
all. Springcontacts.com may be able to provide you the ability to calculate and charge tax on shipping per your requirements. As a standard, shipping cost is simply calculated using the allowed Carriers and Seller settings in Marketplace Tools. The
shipping amount(s) calculated and collected will be transferred to the Seller along
with the order amount and taxes. Consider this when setting up the
shipping options.
Due to the growth of e-commerce, some states are replacing the traditional approach to nexus with one of “economic nexus”. Economic Nexus emphasizes financial dealings in a state above physical presence. Due to this and other changes, the definition of “nexus” differs from state to state and continues to evolve as governments try to capture revenue from online sales.
In some states, the rules are convoluted or unsettled. A bill passed by the Senate in April 2013 (S. 743: Marketplace Fairness Act of 2013) would require all online companies to collect and remit sales tax in states where they do more than a million dollars in annual revenue. This is a significant change that would provide a single standard for sales tax laws. There are also efforts to establish a “Streamlined Sales and Use Tax Agreement”. A streamlined approach would simplify and standardize state tax laws, reducing the confusion and easing the burden on small businesses. Twenty-four states have signed on to this approach so far.
Some states have also implemented policies for “click through nexus”. Read through our Tax FAQ for more details.
Governments around the world are relying heavily on indirect taxes for extra revenue. As a result, there is increased risk that taxpayers will be caught unprepared. Be sure to properly evaluate compliance with worldwide Sales and Use, Value Added Taxes (VAT), and Goods and Services Taxes (GST).
This module is primarily designed for the United States Taxation System but it can be adapted to other tax systems. For example EU VAT Number, Italian Partita IVA or CF, spanish NIF/CIF, etc.). The Tax Manager allows you to set up tax using “Tax Classes” based on different
parameters. “Tax
Classes” depend on the “Tax Rates” feature, which further depends on
the “Geo Zones”. Thus, you need to understand this hierarchy to properly
set up the taxes for your products.
Consult your tax advisor to understand which options and settings will work best for you. Although we can’t help with the legalities of where your company may have established Nexus, or how much tax you should collect, this tutorial will show you how to set up and manage tax calculations in your Springcontacts.com store.
To start, log-in as a Seller and locate the Tax Manager under the Marketplace Tools links. Then follow these steps:
1. Establish Your Tax Methods:
a. Create a Geo-zone:
Geo-zones are the geographical areas (world sub-regions) which tax rates are applied to. They can be defined by country, state/province, region, or zip/postal codes.
If needed, our tools will allow you to create custom zones, for instance, you can combine a few neighboring countries like France, Germany, the Netherlands and Belgium.
There is no limit to the number of tax zones you can set up, but a geographical area can only be defined once.
Name: Tax Your Country
Country: Your Country (all the countries are already available, so you don’t need to add any more!)
Zones: All zones (or create/select a zone you need)
If you need to set Tax rates for different zones in your country create the Geo-Zones name(s) to reflect each zone!
Don’t get confused with the title “zone”—it’s just the way our software defines states/provinces. When you add a new zone, you need to select the “Country” to which it belongs.
Step-by-step:
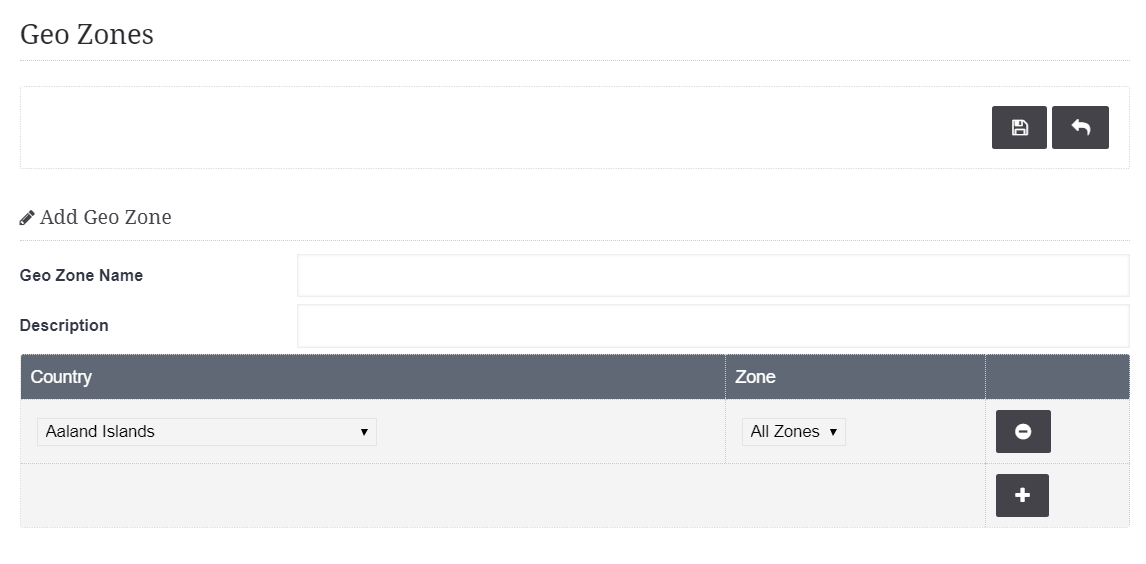
1. Select Tax Manager -> Geo Zone from the Marketplace Tools menu.
2. Press + to add a Geo Zone.
3. Geo Zone Name: Enter a name for your Geo Zone.
4. Description: Add a detailed description.
5. Press + to add a Country / Zone
6. Select a Country and Zone (State, Province, Etc.).
7. Add additional Geo Zones as required.
6. Save your changes.
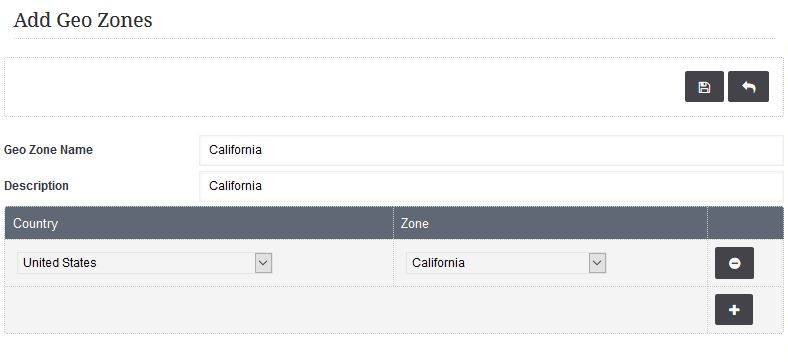
See below for a completed example:
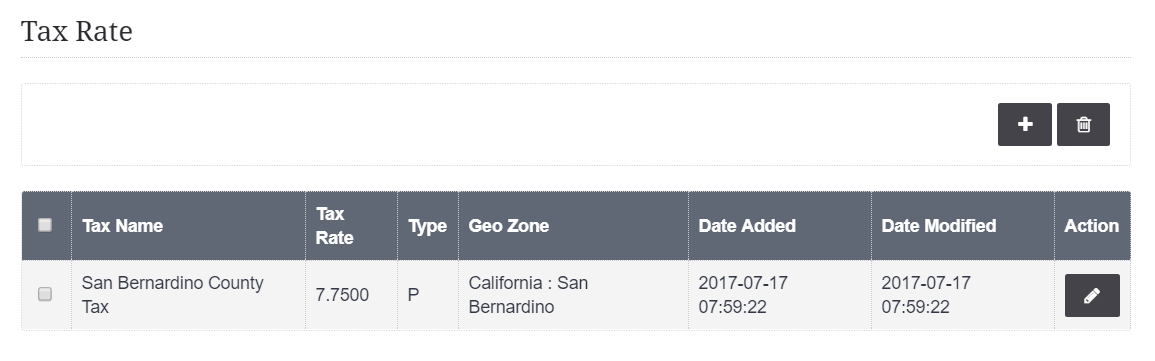
b. Create a Tax-rate:
Tax rates are the percentages at which products or services are taxed. Each zone can have as many tax rates as necessary for products and services that need to be taxed different rates for different jurisdictions (federal, state and/or municipal), then have them compounded at checkout.
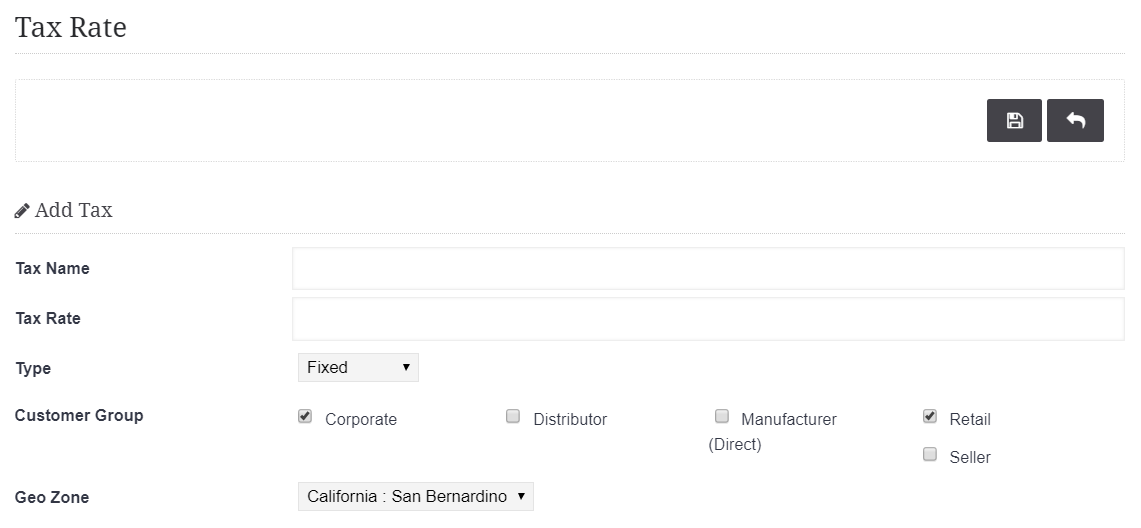
Step-by-step:
1. Select Tax Manager ->Tax Rate from the Marketplace Tools menu.
2. Click the + to add a Tax Rate.
3. Enter a “Tax Name” for the rate.
4. Enter the rate to be applied. If you are not charging a tax rate, enter 0. Note that for customers who are exempt tax will automatically be removed.
5. Select a fixed, or percentage for each specific Tax Rate created.
6. Select the Customer Group to apply the Tax Rate. Retail is the default. A typical selection would be Retail and Corporate.
7. Enter the appropriate Geo Zone.
8. Save your changes.
See below for a completed example:
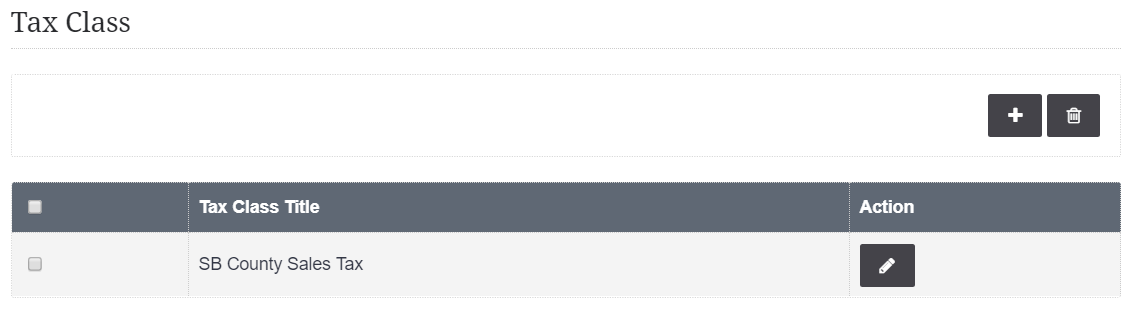
c. Create a Tax Class:
Tax
classes can store multiple tax rates into one category, and allow you to set different tax rates for items such as Shipping, Gift Wrapping and different product classes. Tax classes can be used if you have certain products that are taxed at a different rate, or not at all.
The taxes can be
customized to calculate the taxes based on the payment address (customer) or
the store’s address.
Tax classes require the following information:
- Tax Class Title
- Description
- Tax Rate: selecting “Add Rule” will add a tax rate
that was created in Tax Rates. Base On requires either the payment address
or the store address to be selected. This will determine the amount of tax
added to the shopping cart total in the store front. Priority determines
the position of the tax rate if other tax rates are listed with it.
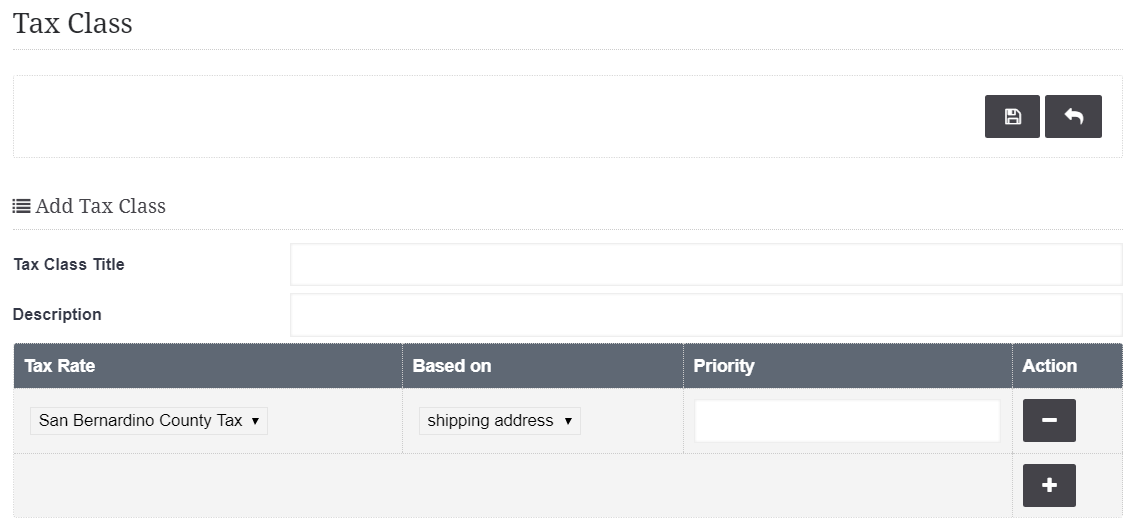
Step-by-step:
1. Select Tax Manager ->Tax Class from the Marketplace Tools menu.
2. Click the + to add a Tax Class.
3. Enter a Tax Class Title.
4. Add a Description for this Tax Class.
5. Click + to add a Rate.
6. Select the Tax Rate to be applied to the Tax Class. A typical selection would be the rate you set for your primary Nexus.
7. Enter the Basis. Typically the Ship To Address.
8. Enter the Priority. For zones with more than one rate, enter a number which represents the Priority in which this tax rate should be calculated against other tax rates in this zone. Tax calculations will be compounded in order of highest priority (lowest number), to the lowest priority (highest number).
9. Add additional Rates for this Tax Class as needed.
10. Save your changes.
See below for a completed example:
A tax class must be added to each product individually in order to apply tax rates for a purchase during checkout. The tax class field is located under the Data tab in Products. Simply select a tax rate, or “None” if taxes will not be applied to the product.